How-to guide: Fixing unresponsive screens with MacBook screen and Motherboard repairs in South Africa
Comprehending Device Fixing: Secret Considerations for Effective Screen Repair Work and Motherboard Fixing
When it pertains to gadget repair, comprehending the subtleties of screen and motherboard concerns is important. You'll require the right tools and an understanding of numerous screen types to tackle repair work effectively. Usual troubles often arise, and understanding how to identify them can conserve time and disappointment. But what are the essential steps and precautions you should remember to guarantee an effective repair? Let's explore this additionally.
Vital Devices for Display and Motherboard Repairs
When dealing with display and motherboard repair work, having the right devices is crucial for success. You'll need a precision screwdriver collection, as these tiny screws require details sizes to stay clear of removing. A spudger or plastic pry tool helps you safely open gadgets without harming the casing. Do not neglect a set of tweezers; they'll aid in dealing with tiny parts.
For display repair services, a suction cup can raise the screen without cracking it. You should additionally have a warm gun or hairdryer on hand to loosen adhesive. A multimeter is very useful for detecting motherboard issues, enabling you to look for shorts or defective connections.
Ultimately, an anti-static wrist strap will shield delicate electronic parts from static power. With these tools in your arsenal, you're well-equipped to handle the majority of display and motherboard repair work efficiently and effectively.
Comprehending Different Display Kinds and Their Repairs
Lots of people do not recognize that displays come in numerous types, each with its very own repair considerations. On the other hand, OLED and AMOLED displays supply lively shades and deeper blacks, but they're extra fragile, requiring specialized methods for repair work.
Some displays have extra layers, like touch sensors, which can complicate repair work. Recognizing these distinctions will conserve you time and initiative, making certain a smoother repair process.
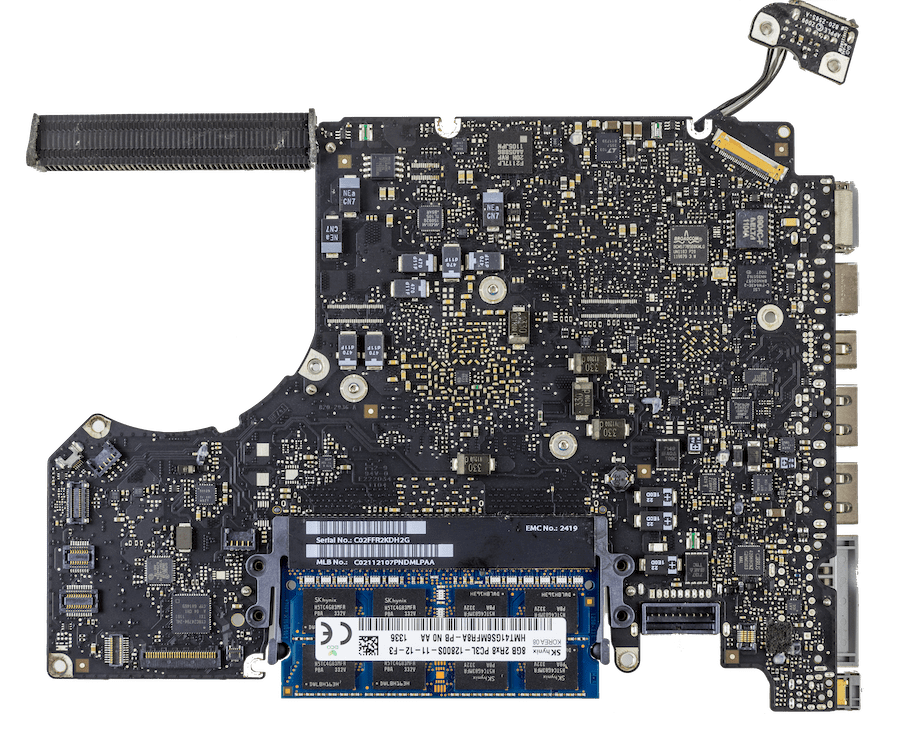
Typical Motherboard Issues and Diagnostic Techniques
When your gizmo begins breaking down, the motherboard could be the perpetrator. You'll desire to recognize the indications of motherboard failing and recognize how to use diagnostic tools efficiently. Allow's discover usual repair work strategies to obtain your gadget back in working order.
Signs of Motherboard Failing
Although a computer system's motherboard is typically considered given, acknowledging the indicators of its failure can conserve you time and cash in the long run. If your computer system all of a sudden won't boot or displays random shutdowns, that's a red flag. You may additionally see uncommon beeping seems during startup, which typically show equipment problems. Constant accidents or freezes, particularly when running requiring applications, can signal a failing motherboard. In addition, if peripherals like USB tools aren't identified or your system experiences getting too hot, these signs could indicate motherboard issues. Regularly looking for physical damages, like burnt areas or swelling capacitors, is necessary. Being aggressive about these signs will help you address possible failures before they escalate.
Diagnostic Tools Introduction
Recognizing possible motherboard concerns is just the very first action; recognizing how to detect them effectively can save you a great deal of disappointment. To begin, you'll intend to have a multimeter handy. This device helps measure voltage and resistance, enabling you to determine faulty elements. Next, consider utilizing an ARTICLE (Power-On Self-Test) card. It provides you error codes that can pinpoint details problems throughout boot-up. Furthermore, software program diagnostics can provide insights right into hardware performance, assisting you area problems. Do not forget aesthetic inspections either; melted parts or protruding capacitors can signal major problems. By utilizing these analysis devices, you can streamline your troubleshooting process and tackle motherboard issues with confidence.
Common Fixing Techniques
Fixing typical motherboard problems calls for a systematic technique to guarantee you deal with the trouble effectively. Identify the signs-- unresponsive displays, arbitrary shutdowns, or failure to boot. Use diagnostic devices like multimeters to inspect for short circuits or harmed components. As soon as you pinpoint the issue, take into consideration techniques such as reflowing solder on fractured joints or replacing blown capacitors. For software-related problems, a biography reset can commonly fix conflicts. Constantly make sure that you're grounded to avoid static damages while working. Routinely document your findings to track repeated issues, which can help in preventing future troubles. Ultimately, a methodical technique not just fixes the current concern however likewise boosts your general fixing skills.
Step-by-Step Guide to Display Replacement
Replacing a busted display can seem daunting, but with the right devices and a little perseverance, you can tackle it on your own. First, collect your devices: a screwdriver set, a suction cup, and a plastic spying tool. Start by powering off your tool and removing any screws near the screen. Utilize the suction mug to carefully lift the display, developing a small space. Put the spying tool right into the void to meticulously detach the screen from the gadget's body.
As soon as you have actually eliminated the broken screen, align the brand-new screen and connect the cables firmly. Power it on, and appreciate your freshly changed screen!
Troubleshooting Motherboard Troubles: Idea
When your device isn't powering on or acting oddly, it may be a motherboard issue. You'll wish to acknowledge typical signs and collect the appropriate analysis tools prior to you start troubleshooting. Allow's discover the essential steps to recognize and repair those bothersome motherboard troubles.
Usual Signs And Symptoms Identified
Determining typical signs and symptoms of motherboard problems can conserve you time and aggravation throughout troubleshooting. If your gadget will not power on, that's usually a clear indication of a motherboard issue. You could additionally notice arbitrary system collisions, which can show damaged parts. In addition, if you listen to warning noises during startup, it's your motherboard trying to interact a mistake. Overheating can also be a signs and symptom, recommending that there's a problem with power distribution or cooling. If peripherals aren't identified or you see distorted graphics, these could point to motherboard malfunctions. By acknowledging these symptoms early, you can take the essential steps to diagnose and fix your device properly. Keep in mind, attending to these signs promptly can stop further damage.
Diagnostic Devices Summary
To efficiently troubleshoot motherboard troubles, having the best diagnostic tools more tips here available can make all the distinction. Beginning with a multimeter to check voltage levels and continuity on numerous components. This device helps you identify power concerns or brief circuits. Next, utilize a MESSAGE (Power-On Self-Test) card to detect boot problems by displaying mistake codes that suggest details failures. A thermal video camera can likewise be very useful, as it helps spot getting too hot components that may lead to motherboard failure. Finally, having a trusted power supply tester assurances that your power source isn't triggering the concerns. By utilizing these tools, you'll gain useful understandings, allowing you to identify issues a lot more precisely and efficiently.
Repair Service Process Steps
Start by powering down the tool and disconnecting it from any type of power resource. Next off, remove the back cover to access the motherboard. Seek any kind of visible signs of damages, like burnt components or loose connections. If you spot anything uncommon, record it for more evaluation. Utilize a multimeter to inspect the voltage across different parts of the motherboard, ensuring they're running within acceptable arrays.

Safety And Security Preventative Measures Throughout Gadget Fixes
While fixing devices can be fulfilling, it's important to prioritize your safety throughout the process. Beginning by unplugging the gadget and getting rid of batteries to avoid any kind of electrical risks. Usage appropriate devices to avoid slides or injuries; a committed toolkit can make all the distinction. Always operate in a well-lit location and maintain your workspace organized to decrease crashes.
Use shatterproof glass to shield your eyes from little debris, and think about gloves to avoid cuts or scrapes. Beware with fragile elements, as they can conveniently break. If you're dealing with batteries, confirm they're not inflamed or leaking, as this can pose a significant threat.
Familiarize on your own with the materials you're dealing with, and never ever rush the fixing. Taking your time will certainly assist you remain concentrated and safe. Following these preventative measures will certainly add to a smoother and safer repair work experience.
When to Look For Expert Aid for Repair Work
Despite having safety and security preventative measures in location, there are times when tackling a device repair service may be even more than you bargained for. If you see consistent concerns after a DIY effort, it's a clear indicator to seek professional help. In addition, if your gadget reveals indicators of water damage, it's crucial to get in touch with a specialist right now. They have the devices and experience to examine and fix damages that can aggravate if left neglected.
An additional indication is when you're unclear about the fixing process. Keep in mind, trying a fixing without the ideal expertise can lead to further damage and higher costs.
Regularly Asked Concerns
Exactly how Long Does a Regular Screen Repair Work Take?
A typical display fixing usually takes about half an hour to an hour, relying on the tool and complexity - MacBook screen and Motherboard repairs in South Africa. If you've obtained the right tools and parts, you can accelerate the procedure considerably
Can I Change a Display Myself Without Experience?
You can replace a display on your own without experience, but it's dangerous. You may harm your tool additionally or click resources void the service warranty. If you're uncertain, take into consideration seeking expert help for an extra dependable repair.
What Is the Cost Range for Motherboard Repairs?
The expense for motherboard repair work generally varies from $100 to $300, relying on the damage and the tool. It's a good idea to get quotes from a number of repair service shops to assure you're getting a fair cost.
Are Refurbished Parts as Dependable as New Ones?
Reconditioned components can be reliable, but it depends upon the top quality and resource. You must inspect service warranties and evaluations before buying, as some reconditioned items perform nearly along with brand-new ones, while others may not.
Just How Can I Stop Future Screen Damage?
To avoid future screen damage, you need to purchase a resilient situation, use screen guards, stay clear of placing your device in perilous locations, and manage it with care during everyday tasks. Stay mindful of your surroundings!